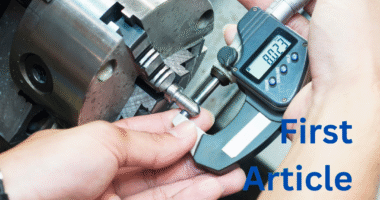
A First Article Inspection (FAI) is a critical process that ensures a new or modified part meets all design, engineering, and quality requirements before full production begins. It’s an essential step in industries such as aerospace, automotive, electronics, and precision manufacturing, where even a small defect can lead to major issues.
However, many organizations fail to achieve the full benefits of FAI due to common mistakes — from missing documentation to incomplete measurements. These errors can delay production, increase costs, and compromise compliance with standards like AS9102.
Here are the 10 most common mistakes in FAI and how to avoid them, with practical real-life examples.
1. Using Outdated or Incorrect Drawings
One of the most frequent FAI errors is conducting inspections using outdated drawings or engineering revisions. This leads to nonconformities because the inspected part doesn’t match the latest design intent.
Example:
An aerospace supplier used a previous revision of a bracket drawing for FAI. The design had changed slightly — one hole diameter increased — and the FAI was rejected by the customer.
How to avoid it:
Always verify you’re using the latest drawing revision and ensure all team members have access to updated documents.
2. Incomplete FAI Documentation
Missing or incomplete forms — especially AS9102 Form 1, 2, or 3 — are a major cause of FAI rejections. Every characteristic, material, and process must be traceable.
Example:
A metal parts manufacturer submitted an FAI missing supplier certificates for heat treatment. The audit failed, and they had to repeat the process.
How to avoid it:
Use a comprehensive FAI checklist and verify all supporting documents are attached before submission.
3. Skipping Ballooning of Drawings
Ballooning (numbering each characteristic on the drawing) is crucial to link inspection results with design features. Skipping this step causes confusion and errors in traceability.
Example:
An electronics supplier failed to balloon the PCB drawing. During review, inspectors couldn’t match measurement results to design features, leading to delays.
How to avoid it:
Always balloon drawings systematically before inspection — one number for each measurable feature.
4. Measuring Incorrect Features or Units
Another common mistake is using incorrect measurement tools or mixing up measurement units.
Example:
A machinist measured a component in inches while the drawing required millimeters, causing incorrect tolerance reporting.
How to avoid it:
Double-check measurement units and calibrate all tools before inspection. Include a verification step for conversion accuracy.
5. Ignoring Non-Measurable Characteristics
Some FAIs overlook characteristics like color, surface finish, or labeling, assuming they are minor. However, these are critical for aesthetics and compliance.
Example:
A plastic parts supplier ignored color code requirements. The customer rejected the shipment due to mismatched shade, despite all dimensions being correct.
How to avoid it:
Inspect all listed features — measurable or not — including visual, cosmetic, and labeling criteria.
6. Conducting FAI After Mass Production
FAI must be performed on the first production piece, not after a batch has already been made. Skipping this leads to wasted resources if errors are found later.
Example:
A fastener manufacturer produced 2,000 parts before FAI. When the FAI failed due to incorrect thread pitch, the entire batch became scrap.
How to avoid it:
Always perform FAI before full-scale production begins to catch issues early.
7. Poor Communication Between Departments
Miscommunication between design, manufacturing, and quality teams often causes FAI errors or delays.
Example:
The engineering department updated a design tolerance but didn’t inform quality control. The FAI used old criteria and failed customer review.
How to avoid it:
Hold cross-functional reviews before FAI to align understanding of design changes and inspection expectations.
8. Failing to Verify Supplier or Material Certifications
Every material or outsourced process (e.g., coating, heat treatment) must have supporting certifications. Missing these documents can lead to FAI rejection.
Example:
An automotive supplier couldn’t provide a certificate for anodized coating thickness. The customer required proof of compliance, delaying product approval.
How to avoid it:
Collect and verify supplier certifications before submitting the FAI package.
9. Inaccurate or Unclear Measurement Data
Poorly recorded inspection data — such as illegible handwriting, missing tolerances, or unclear references — can invalidate an otherwise good FAI.
Example:
A machinist recorded results without noting the corresponding drawing feature numbers. The auditor couldn’t verify the data, and the report had to be redone.
How to avoid it:
Use digital inspection reports or typed FAI forms for clarity and accuracy.
10. Neglecting Re-FAI After Process Changes
Once an FAI is complete, some manufacturers mistakenly assume it’s permanent. However, any change in process, equipment, or supplier requires a new or partial FAI.
Example:
A company moved its production to a new facility but didn’t redo the FAI. The new line produced parts with different tolerances, causing quality issues.
How to avoid it:
Always review if a re-FAI is needed when process conditions change — it’s a key step in maintaining compliance.
Conclusion
A First Article Inspection is more than a box-ticking exercise — it’s a quality assurance cornerstone that builds trust and ensures product integrity. Avoiding these ten common mistakes — from using outdated drawings to neglecting re-FAIs — helps streamline production, prevent costly errors, and maintain compliance with industry standards like AS9102.
By combining accurate documentation, clear communication, and disciplined process control, organizations can turn the FAI process into a competitive advantage that ensures every product meets specifications the first time, every time.


